Friday, 4 May 2012

SEE: Modelco Lash Fibre mascara review


Alright so I recently got my hands on another mascara, I’m sorry I can’t help it to be honest I think of it as an investment for my blog so whenever I buy something I can blog about it, I’m showing you guys some love from me to you.

For IMATS last year there was this whole craze about longer lashes with no mascara, the secret? Fibres. I just remember being like I really want longer lashes I want to try this fibre lash thing out but my friend stopped me because she thought it was lame and I was just like there’s nothing lame about wanting longer lashes.
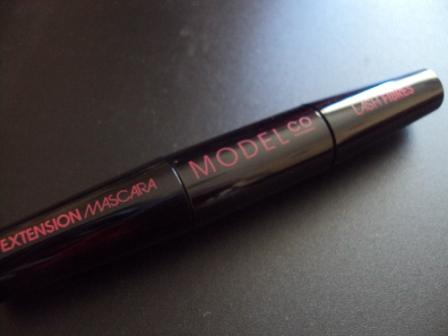
Modelco lash fibre mascara

Modelco has a mascara called Fibre Lash and to be honest with you all I was extremely excited to try this product out (being a mascara lover and all).

Unfortunately it’s not as great as I anticipated it to be. When you think wow adding fibres to your lashes they must look extra long and flirty and fluttery looking, that sort of kind of didn’t happen.
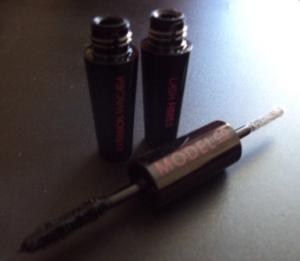
Modelco Lash fibre mascara
Now don’t get me wrong it’s a great mascara but when I got it, I expected AMAZING STAND OUT lashes and it was kind of almost there but not really and to be truthful my Maybelline Falsies mascara works a lot better and application heaps quicker especially when you’re in a rush.

But because I believe in giving every makeup product out there a chance, If you do decide to purchase this particular mascara just don’t expect it to have that WOW factor.

So application is really easy but can be a bit of a pain because I’m so paranoid about having my mascara open for too long with the air getting in and drying up the mascara quicker I literally close it everytime I have to switch to apply the fibres.

So to give you an insight on how to apply this,

Extension macara in black


Step 1: Apply the extension mascara FIRST, don’t chuck a me and not read the instructions. I put the fibres on first and DUH where would you expect it to go but in your eyeball because it has nothing to stick to.
Step 2: Apply the lash fibres to the mascara already on
Step 3: Re apply that extension mascara to the lash fibres and you’re done.
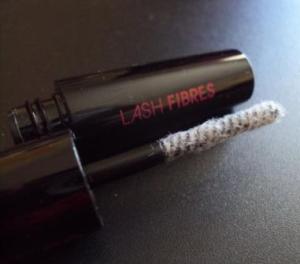
Lash fibres


You might think it’s that simple and yeah it is, it’s just if you’re anything like me and being paranoid about mascara drying out, I closed the lid on that mascara everytime I had to swap it around to use the lash fibres and then back to the extension mascara.

Props for a makeup product that’s compact and versatile but for me personally, it gets annoying when you’re in a rush.

Thursday, 3 May 2012

A tip for all you mascara lovers out there


I love being the makeup guru around my group of friends, they ask me the funniest questions and do the funniest things when it comes to makeup.

This post is dedicated to my good friend who is a makeup purist you could say, so no makeup worn hardly ever, only on super super special occasions and of course when she lets me practice makeup looks on her.

I love mascara, one of my favourite makeup products out there and I could never understand why some girls wouldn’t wear JUST mascara because to me sometimes that’s just all you need. So I put on mascara for my friend whilst I was doing a makeup look and she told me she doesn’t like wearing mascara and to that I replied, WHY????? and WHAT??? She said that she didn’t like taking it off because it was such a chore and it got everywhere and left black marks around her eyes and I laughed because it was so cute and funny.

So here’s how I take off my mascara and if you’re anything like my friend try it this way.


  • Take a makeup removal cotton pad and put your eye makeup remover on it.
  • If you have eye shadow on wipe from the inner corner out and then when you get to your lashes, eyes closed and roll downwards on your lashes, this helps to break the seal of the mascara and it won’t go everywhere.

Hope this helps makeup purists everywhere and if you didn’t know, well there you go. That’s another way to do it.


Another quick tip: Sometimes your eye makeup remover can substitute for lipstick removal too.

Tuesday, 1 May 2012

Dear diary: Bad hair day? Try a bad hair weekend


Okay here we go…

Over the weekend I decided to chop off my long straight hair to what you would call a sort of bob styled hair cut, I suppose.

Silly me because my normal hairdresser was really busy, he couldn’t cut it for me so I decided to go somewhere else because I was desperate for that hair cut. It SUCKS! By the way if you were wondering.

Not going to lie, it’s not the worst hair cut I’ve ever had but sort of kind of not really what I wanted. The way he cut my bangs, it was just too short for my liking, the front part, lovely, really nice, I liked it and the back, weirdest styled hair cut of my life. Not the worst but the most, I’m trying not to be mean so let’s just say one of the most inventive haircuts I’ve had, in a weird kind of way.

I went home and styled it the way I wanted, wavy, some parts straight and it did look nice, it actually made me look a lot mature and professional looking especially because I was wearing a navy blue jumpsuit with a blazer on. So I thought okay well if it looks nice kind of wavy in some parts I’m going to go get a perm then because my hair just cannot take curls, they just end up falling flat as soon as it’s done.

Soooooooooooo I went to get my perm, a wavy perm, costed me $100, sat there for 3 hours, 2 days later one side of my hair is curlier than the other. OH MY GOSH! Seriously can this bad hair weekend get any worse? The perm itself wasn’t too disappointing well that would be a lie, I actually regret getting a perm and I think it was just because of the initial hair cut I wasn’t happy and I seriously thought perming it would be a quick fix solution.

Lesson learnt: perms do not suit me and I’m going back to my initial thinking of when I go get m hair cut don’t expect it to look good.

Hope you all had a great weekend unlike me.

Talk about a hairy situation. Literally.

Friday, 27 April 2012

FEEL: Out the door topcoat review


Forgive me my last product review was on nail polish, and yes you guessed it, it’s going to be another nail polish review, soon enough I’ll be talking about my nails just as much as my hair posts, but I mean I’m sure you all love doing your nails so this review is going to be a goodie.

Alright so I shop a lot so most of these blogs start off with I went to my beauty supplier, because I literally see her every week because I work near there okay and like I said in my Look at all this stuff blog I’m going to stop spending so much but only on the things I already have.  I can still buy other stuff. Hehehe.

I originally wanted to get some OPI top coat because they sell it for a good enough price I suppose. The thing was she ran out of OPI nail polish well the top coat and I was like but whyyyyyyy (obviously because people bought it) no I mean why as in why when I want to get it, they don’t have it, but she introduced me to this other top coat called…

Out the Door

Out the door topcoat


OMG would it be bad for me to say that it’s almost as good as OPI but maybe even better?

Let me give you guys some reasons..
  1. It dries SUPER FAST! Think superman fast when he’s flying or whatever. 45 seconds and it’s dry, second coat? Go for it!
  2. Durable like you wouldn’t believe, day 5 showed my friend my nails and she’s like wow did you get them done and I’m like no I did them myself and what a compliment, it looked so good that she thought a professional did it. That and it’s only started chipping on my pointer finger on my left hand.
  3. And of course with any top coat there’s that high shine that we all love, and yes it so does that as well.
Will definitely be buying this and rebuying it, it’s that good.  Oh and did I mention it only costed me $7.95.

By the way let me explain the picture, unfortunately she didn't have the actual little bottles to sell, only the massive ones, so she transferred it into an empty nail polish bottle, I mean they are a wholesaler/retailer after all.