Thursday, 5 April 2012

A nifty gift idea


When it comes to birthdays and present giving in general, I get so excited because I love to make things. I like to get all artsy and just creative. The only downside I think about being too creative is you have way too many ideas that you just want to put out there all in one go and sometimes it just doesn’t work.

I decided this year as a gift to one of my closest friends, I would make slash buy her something and I haven’t done something like this in such a long time and making this gift for her reminded me of how much I love being creative and having wonderful friends that inspire me to make these things.

The theme for this gift is purple as it is her favourite colour. So I went to the shops and just bought a whole heap of little nick nacks that she might like and could be useful for her.


Here’s what I put in, rose clips, a compact mirror, powder puff, falsies, nail polish remover wipes, nailpolish, iphone case, lipgloss, bracelet, 3 piece baking tool set, chopsticks (random) and a nivea sample for her face.


These are the things that I bought to make this gift which cost me $10 and I had some craft stuff lying around as well.

-        Gift box ($4)
-        Tissue paper ($2)
-        Ribbons ($4)

First decide what fillers (that’s what I like to call them) that you’re going to add. For me I decided to put in

-        Lots and lots of ribbon
-        Some mini bells
-        Some dowels
-        Tissue paper
-        A bunch of sequins that say happy birthday or are purple


Think of a birds nest and when the person opens the gift they just start digging around to see what else there is and it’s something exciting because they don’t know what you’ve put in and don’t know how much stuff there is.

Second get the tissue paper and fold it so it fits inside the box ensuring that there is an excess amount at the ends. This excess will “wrap” the gifts.


Third place all the ribbons inside the box. Make sure you curl the ribbons as well and try to use different types of ribbon some curly maybe even add some shredded paper. The whole messy look gets the receiver of the gift more excited because they’re just going to keep looking. It’s like opening 12 gifts in 1 thing every time they find something.

Fourth, add in the fillers, sprinkle the sequins around the box, the bells, the dowels anything you want. Be creative. A lot of these things I already had from previous arts and crafts projects, it helps to keep them all in a box and pull it out whenever you need it.


Fifth, place the gifts inside the box, hiding some under the ribbons so they can keep looking for what else is in there.


Sixth, with the ends of the tissue paper, fold it over and seal it with a sticker. Here I chose to stick a little purple present sticker I thought looked really nice. It shows you’ve put a lot of thought even for the simplest of things.


Next, for that added touch or smell I should say, spray some perfume onto that tissue paper, the scent will be absorbed onto the tissue paper and close the lid on the box so the smell will be there when they open it.

With the gifts, I thought I’d make it even more personal and I wrote a little bit about what the product was and what she could use them for. For example, with the nail polish I wrote,

-        BYS nailpolish: Getting your nails in touch with the fashion world. Don’t forget the toes too, because feet are ugly.

That’s just a little inside joke between her and I because she knows I hate feet. Just something like that shows how much you value your friendship adding things about each other and why that product reminds you of that person.

So I wrote them onto little cards and just tied it up with ribbon, making it look like a parcel and it just adds something extra to the gift.


I know when you think of giving a gift, you think a card, you need to buy a card. I hate buying cards to be honest with you, I just like making them and coming up with my own nifty little sayings. Have you guys watched 500 days of summer? I should have a job like that.

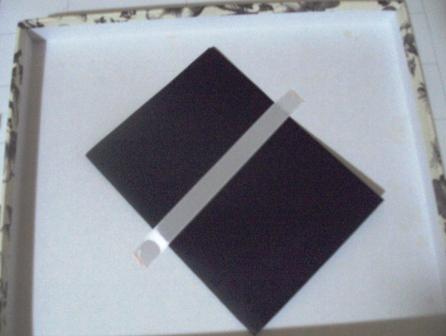
But what I did instead was on the lid of the box on the inside, I placed a piece of ribbon across the box and slipped under a note that I wrote just for that person, saying happy birthday and how much they meant to me and all kinds of soppy stuff, like you would, especially if she’s your best friend. 


Finally, wrap the box around with a piece of ribbon and here I added a little musical tag with her name at the back which just gave the box some added décor and it looks pretty snazzy too if I say so myself.

Tuesday, 3 April 2012

It's about mascara, enough said.


I apologize, I really couldn’t come up with a title for this. Anyway, back to the blog.

Let’s say you woke up late and you literally have 10 minutes to get out of the house. You don’t have enough time to put on a full face of makeup unless you’re pro like that, or if you’re like me you’d rather take your time getting ready.

It doesn’t bother me that I leave the house with no foundation or bronzer or concealer as long as I have one thing, mascara. If I could only have one makeup product in the world, it would be a tube of mascara, concealer coming in second. I think that’s why I can spend $50 on a tube of mascara and not care because I love it, but that’s not the only reason.

Being a makeup artist, mascara is essential in my kit  but has the shortest life span. I change mascara after 6 weeks because after that, it gets all flaky due to air exposure. (That and dependent on how many clients I have within those 6 weeks.)

-        Bin your mascara after three to six months, you’ll find that the longer you keep it, the flakier it becomes when you remove it.

-        DON’T  pump your wand into the mascara tube, this just allows more air to enter the tube and dries out a lot faster cutting down the longevity of your mascara, instead twist the wand around inside the tube

-        Want to go for that second or even third coat? Make sure you apply the mascara when it’s still wet, you’ll find that waiting for it to dry and then applying it, will give you clumps.

Sometimes when applying mascara, I’ll find that there is way too much product on the wand and because I don’t want to wipe the excess off onto the rim, be your own makeup artist and

-        Apply that excess product onto the back of your hand (ensuring it’s clean) and use a [disposable] mascara wand to apply that mascara to your lashes otherwise there will be way too much product on your lashes you might find it hard to spread out and it’ll just go everywhere. 

Two of my favourite mascaras that I'm using right now

Shiseido Perfect Mascara in BLK 901 (This was the $50 one I was talking about)

Maybelline The Falsies volum' express in Black Drama

Like what you've read? Please leave a like it helps me out a lot and don't forget to follow my blog and twitter, it makes me happy. =)


Friday, 30 March 2012

SEE: MAC cream colour base in pearl frost review

First and foremost I wanted to give a quick little explanation as to why I haven't been posting anything up on see.smell.feel for about 2 weeks now and it's because I've become really busy out of nowhere and when I started this blog, I had a lot more time to give it my full attention and even now I feel bad for not even putting up a post within 2 days for you lovely followers.


So I've decided to still do product reviews keeping the name, but rather than 3 products all at once, maybe one at a time.  


SEE relates to the makeup products you apply and see on your face.


So here's the very first product I'd like to review under the category SEE


MAC cream colour base in pearl frost

MAC cream colour base in pearl frost


My favourite part of any makeup application is being able to apply highlight to the top of your cheeks. 
There’s something about that sparkle when it hits the light which makes your face glow. For just a tiny brush of highlight, it has such an effect that I really love. The way it sits on any skin colour and the subtlety it has when applied is truly magical. I’m on a high right now talking about this product, it’s great used on foundation or even on bare skin. 
Want more? It’s a versatile product! Meaning it can also be applied to the eyes for that browbone highlight and also the lips for that plump look.

Caroline’s tip: Just go try it out!


Monday, 26 March 2012

I talk about my hair again.. and PPS root lift hair volumiser


I feel like all I talk about right now is my hair.
I’m sorry, it happens okay. Sometimes I’ll talk about makeup and beauty products and then it’s just only because I got a haircut in case you haven’t read. I mean how could you miss all those blogs.
( These hair blogs are up on my wordpress blog - lalalinee.wordpress.com)
I really wanted some volume through my hair, especially at the roots as my hair is pretty thick and has volume everywhere else but the roots.
Over the weekend I spent a lot of time in an area where every corner you turn there is a hair salon or hair supply shop and I’m not complaining, I love it and discount prices on products and friendly service (only if you buy something) I mean how could you not love being some place like that.
No but in all seriousness, this hair supply shop I went into were really lovely, they had a new worker who was from america and I could not concentrate on what she was saying because if you have an accent and you talk to me I just get lost because I love accents and my mind totally goes MIA, especially if you have an american or english accent, seriously I’ll dear diary blog on accents and how much I love them.
Regardless, I talked to her for a good 15 minutes about america and where I stayed when I was over there last year and how she was in australia for 2 months already and how homesick she was and now back to what I went in there for. So i asked her if there was anything for my hair that would give me some good volume and just make it look all fluffy and bouncy and full of volume basically.
So they recommended this for me.
PPS root lift volumiser
If you were wondering, I purchased this for $16.95
A mousse  and the nozzle on this thing is INSANE! you can definitely tell that this was designed just for your roots.
         Initial thought -  I sprayed this through the roots of my hair and it was amazing!  The amount of volume I had up there made it feel like I just had an awesome blow dry. The only thing was I did spray a lot through my hair but that could be just me as my hair is thick.
I used this the next day and I didn’t spray as much as i did the day before so my hair went back to flat again by not even midday.
Overall, I like this product a lot, wouldn’t say love just yet, it’s only the second time I’ve used it but on the plus side, the amount I did spray stayed in my hair for the whole day and what I do like about it the most is the fact that you can just scrunch your hair and the product is still there.
The nozzle on this thing, definitely aims at
your roots.